
In this tutorial, we show you how to setup DMARC records in cPanel to specify how mail servers should handle messages from your domain that don’t have valid SPF and DKIM records setup. Since the DMARC standard is used by many email providers (such as Gmail, Yahoo!, AOL, Hotmail, Outlook), it increases your chances of email being delivered successfully. We provide basic DMARC record examples below.
DMARC Setup Steps
- Login to cPanel.
- Click Zone Editor under Domains.

- Click the Manage button next to the domain you want to work with.

- Click the +Add Record button.

- Change the Type from A to TXT.
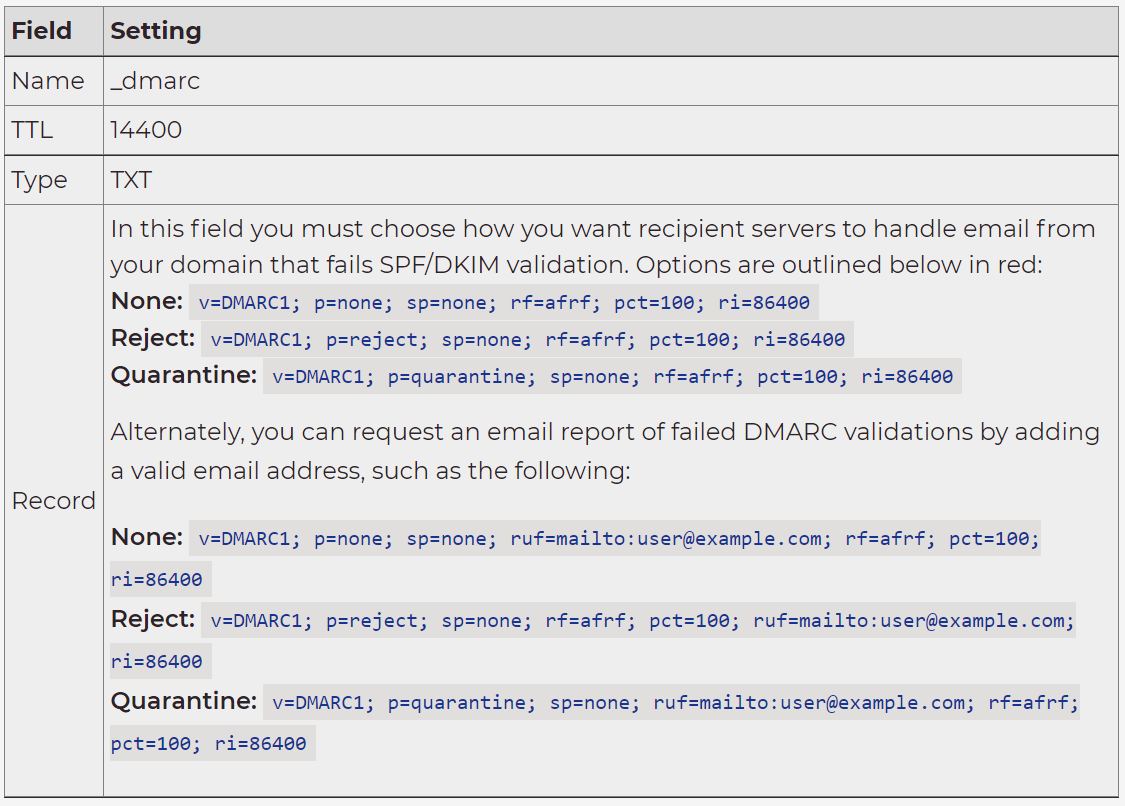
- Enter the Name, TTL, Type, and Record as described below. Keep in mind that you must select one of the following options for the Record field: None, Reject, or Quarantine.
- Click Add Record to save your record.
Note: In Zone Editor, typing “_dmarc” will autopopulate the domain.
 You will then see your record listed in the Zone Records section.
Congratulations, now you know how to setup DMARC records in your cPanel for email validation.
Are you a small business? Then you know that having your emails successfully delivered to the recipients is only half the battle with email marketing. Cantech.in Shared Hosting plans include a number of helpful tools to take your email marketing game to the next level.