This feature of cPanel allows to route all your emails to a specific server. Changes you make here also get reflected in the domain’s DNS entries. This feature is important to create a backup server for your domain’s mail server to receive when your main server is down. You can setup MX entries here to route your mail to Google mail servers when you use Google Apps to manage your emails.
Use this interface to manage your MX entries and Email Routing
Configure Email Routing
To configure the email routing for your domain, follow these steps:
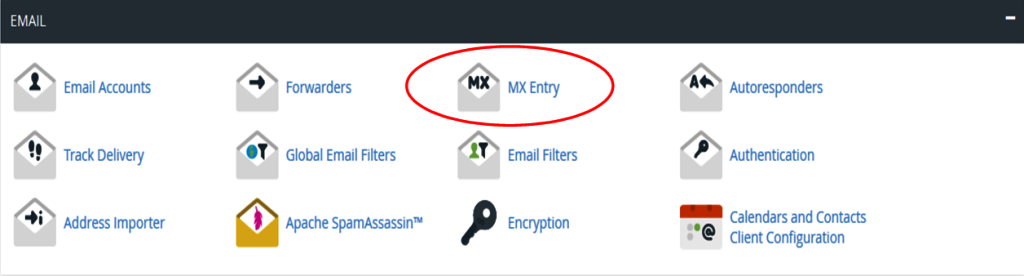
Step (1) – Open cPanel MX Entries by clicking MX Entry from Email Section of cPanel Interface.
Step (2) – Select the domain for which you want to configure Email Routing.

Step (3) – When you will select the domain from the drop down, Email Routing setting will appear. The current applied setting is displayed bold.
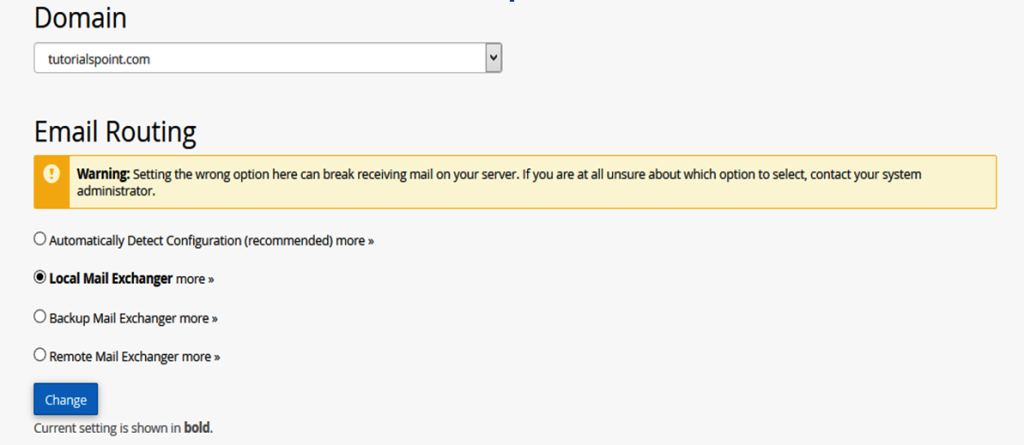
Step (4) – Change your current setting only when you need it. Select any of these four options according to your need.
- Automatically Detect Configuration: This enables the cPanel to automatically detect the best settings according to priorities of your MX records.
- Local Mail Exchanger: This enables your server to receive emails, even if any MX entry of higher priority is found. In this case, emails are sent to both domains.
- Backup Mail Exchanger: In this case, your server acts as backup mail exchanger and if your primary mail exchanger is offline, then it holds the emails until your primary server is back online. You need to have a proper MX Entry for your primary mail exchanger.
- Remote Mail Exchanger: In this case, your domain does not accept any mail and reroutes them to your primary email server.
Step (5) – Click Change and your new setting will appear in bold letters.
Add an MX Record
To add a, MX record, follow these steps:
Step (1) – Scroll down to Add New Record on MX Entry page.
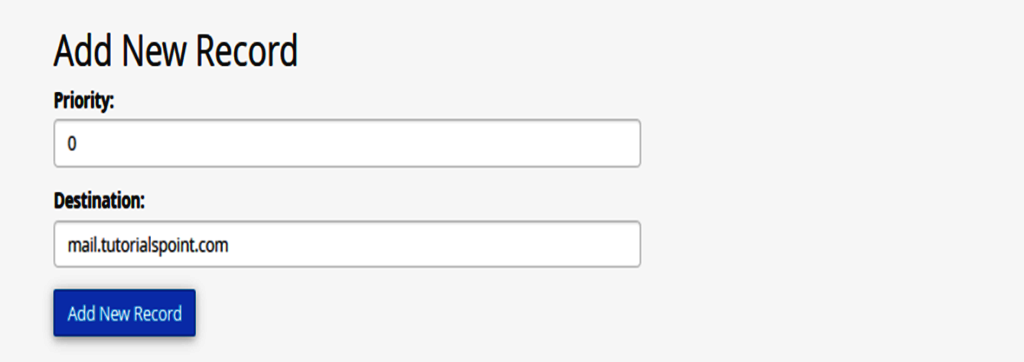
Step (2) – Enter Priority of MX record, lower the number – higher the priority. Zero has the highest Priority.
Step (3) – Enter Destination Domain to which you want to reroute your emails.
Step (4) – Click Add New Record to add a new MX record.
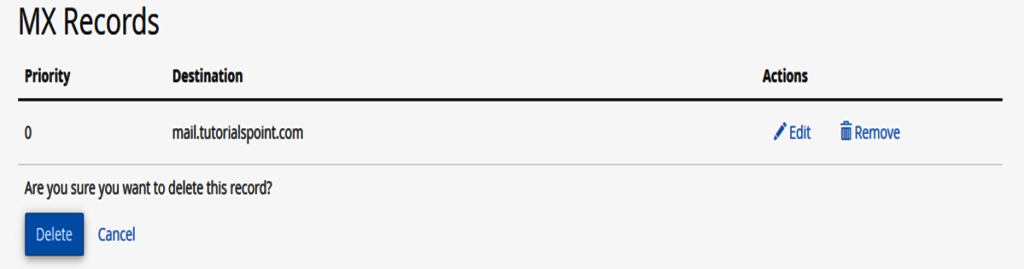
Edit or Remove an MX Record
To edit or remove click Edit or Remove link in Actions corresponding to the MXentry that you want to edit or delete.
When you will click Edit, it will ask you for the Priority and Domain, change what you need to change and finally click Edit to save the changes.

When you click Remove link, it will ask you for confirmation. Click Delete to remove the entry.