
Additional IP addresses are available for Fasthosts Dedicated and Virtual servers.
These can be ordered and purchased through your Fasthosts control panel. Once the IP address has been purchased, it needs to be added to your server. You can do this through your Plesk control panel.
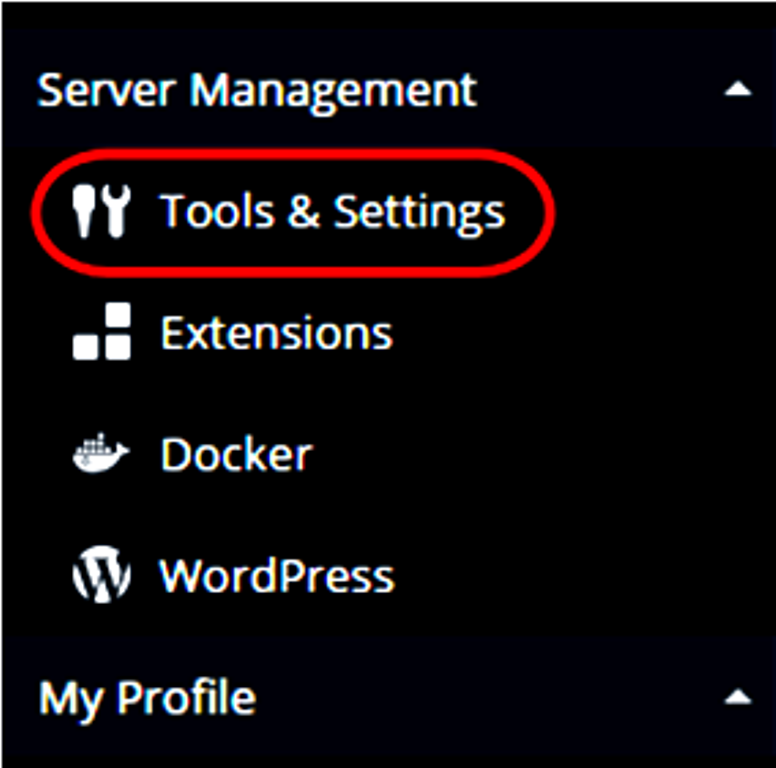
Step (1)-From within your Plesk control panel, select Tools & Settings from the Server Management menu.
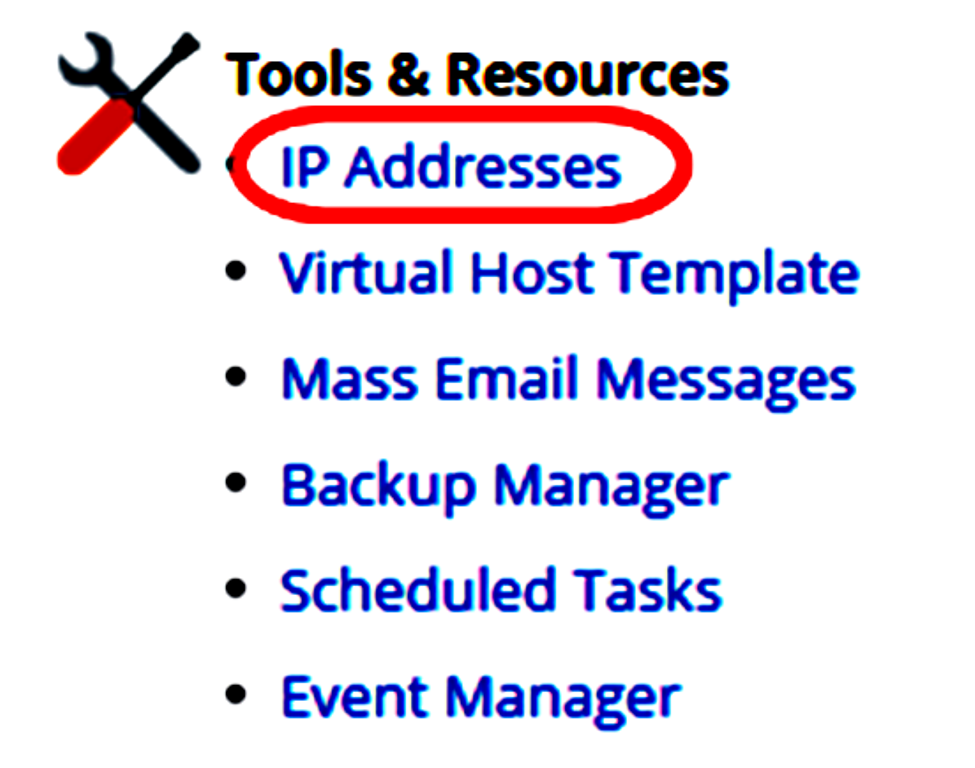
Step (2)-Select IP Addresses from the Tools & Resources menu.
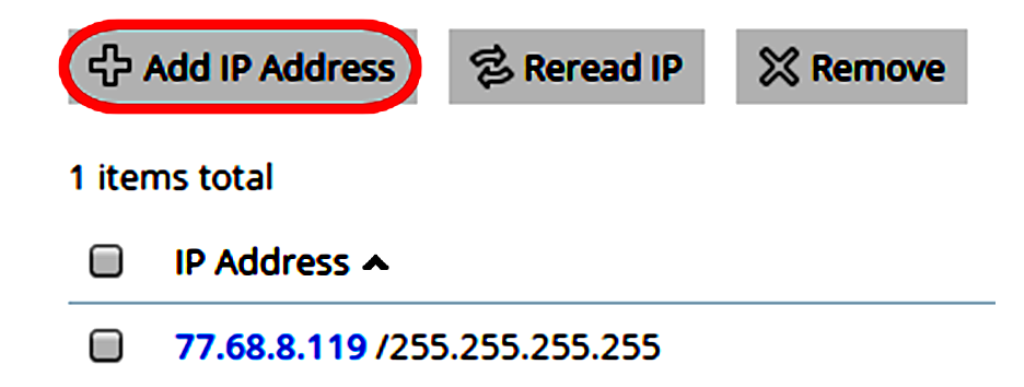
Step (3)-You will see a list of the current IP addresses your server has, to add a new one click on the Add IP Address icon.
Step (4)-You will need to enter the following information about your new IP address.
- Interface: There will only be one option available here so leave this as default.
- IP address and subnet mask: Enter your new IP, a forward slash then a subnet mask of 255.255.252.0. For example, 123.123.123.123/255.255.252.0
- IP address is distributed as: Select Shared If you wish to host multiple domains on your IP, select Dedicated if you only wish to host one domain on the new IP (usually for the purpose of adding an SSL certificate).
- SSL Certificate: Leave this as the default certificate unless you have an SSL
certificate for a domain that will be using this IP.
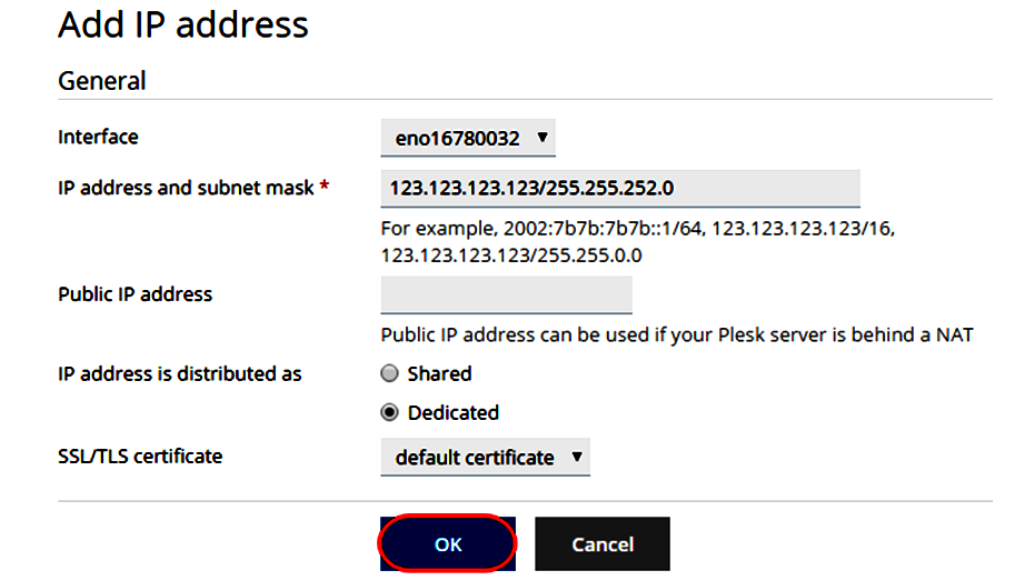
Click OK, you will receive on-screen confirmation that your changes have been made.