
- Log in to the WHM.
- Select the Server Configuration option.
- Click on Terminal to open the WHM terminal window.
- Copy/enter this code in the Terminal window.
cd /usr/local/src/
wget https://download.configserver.com/csf.tgz
tar -xzf csf.tgz
cd csf
sh install.sh
- WHM will run the command and automatically download the compatible version of CSF for cPanel.
- Press Enter to run the installation.
- Display a success message for the completed installation.
Once you install the CSF application, you will have to configure it.
- Go back to the Home of your WHM dashboard and select the Plugins option from the navigation menu.
- you will see the option ConfigServer Security & Firewall. Click on it.
- Click on the csf tab.
- Scroll down a little to the csf – ConfigServer Firewall section and click on the Firewall Configuration button.
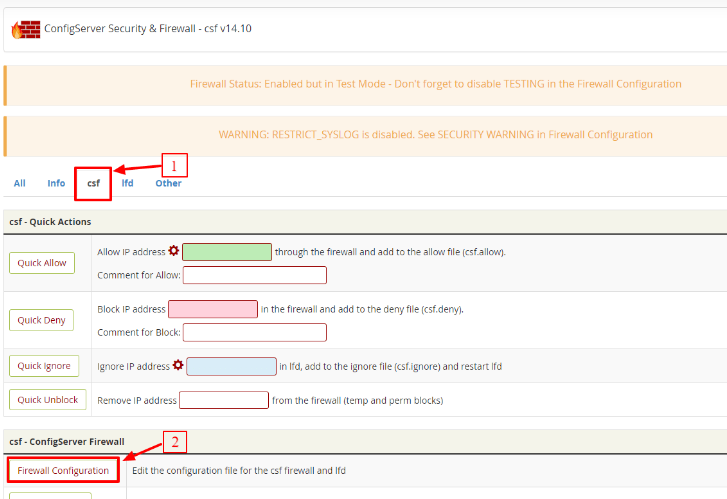
- You will find all the options for the firewall configurations. We will see a quick rundown on the important settings to get you started.
1. Settings for Port Filtering Configuration – IPv4 Port
- TCP_IN = “20,21,22,25,53,80,110,143,443,465,587,993,995,2077,2078,2082,2083,2086,2087,2095,2096,26”
- TCP_OUT = “20,21,22,25,37,43,53,80,110,113,443,587,873,2086,2087,2089,2703”
- UDP_IN 20,21,53
- UDP_OUT 20,21,53,113,123,873,6277
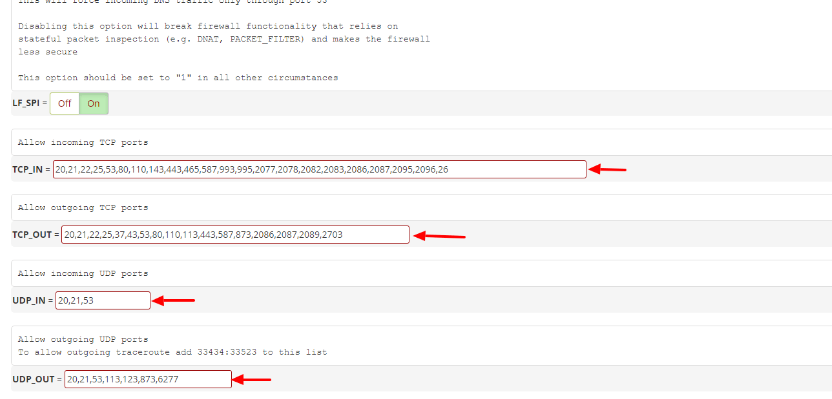
- Once you have changed your SSH port number, add this new port on the IPv4 Port Settings and/or IPv6 Port Settings. You can also add a specific port for a newly installed application on the server from this section.
- We recommend the users who deploy the R1soft/Idera external backup solution to allow the inbound traffic for TCP port 1167 in the port TCP_IN section.
2. Activate the Syslog Monitoring
- Scroll down to the General Settings section and set the SYSLOG_CHECK to 1800.

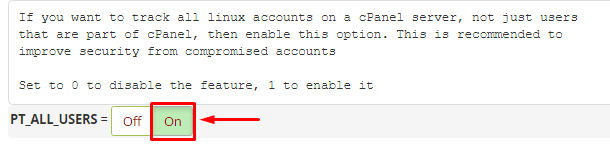
3. Activate the Detection of Suspicious Processes
- Scroll down to the Process Tracking section.
- Set “PT_ALL_USERS” to “ON“
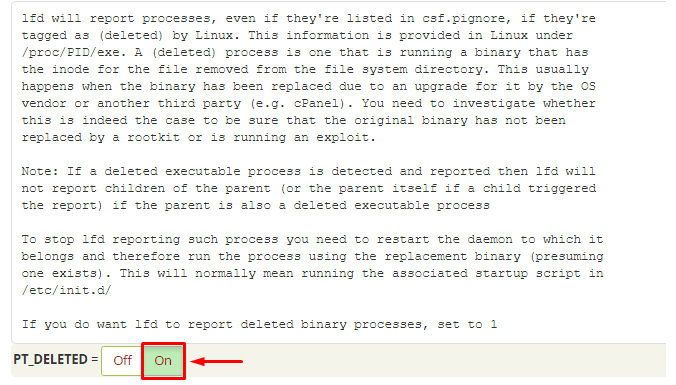
- Set “PT_DELETED” to “ON“
4. Activate Spam Protection and Detection of Suspicious Emails
- With CSF, you can secure your server from spams and bulk email activity.
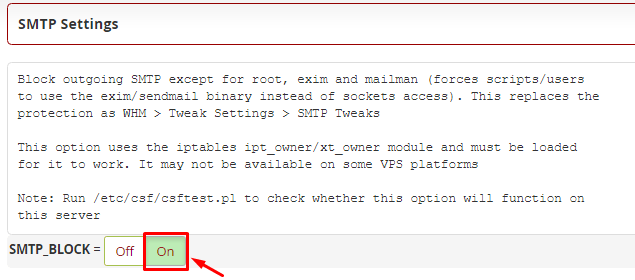
- Scroll down to the SMTP Settings section.
- Switch the SMTP_BLOCK to On.
- Scroll down to the Login Failure Blocking and Alerts section.
- Locate the LF_SCRIPT_LIMIT and set it to 250. It will detect the scripts sending more than 250 emails in an hour.
- Switch the LF_SCRIPT_ALERT to On. It will alert the system administrator via email when the LF_SCRIPT_LIMIT is breached.

5. Save the Changes and Confirm the Status
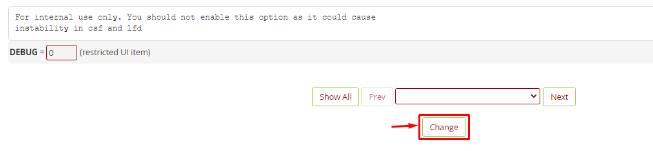
- Scroll down to the end of the page and click the Change button.
- save the configurations you made to the firewall application.
- Click the Restart csf+isd button. It will restart the csf and isd and apply your firewall configurations.
- Click the Return button to go back.
Disable Testing
- Currently, your CSF application is running in the Test Mode. You have to deactivate the mode.
- Reaccess the csf – ConfigServer Firewall section and click the Firewall Configuration button.
- Locate the TESTING option in the Initial Settings section.
- Click on the Off switch.
- Again, you have to repeat the process to save the configurations. Click the Change button, and then the Restart csf+isd button.
- successfully installed and activated the CSF Firewall on your cPanel account.