Deploying Bitbucket Project via Maven
If you used to work with Bitbucket hosting service for projects, which use the Git revision control systems, follow this instruction to add your project to Cantech Cloud.
Create the Environment
Log into the Cantech Cloud Manager
While in Cantech Cloud dashboard, click the Create environment button:
![]()
Pick an application server and select Maven as your build tool. Then specify the cloudlet limits, type your environment name, for example, bitbucket, and click Create.

Get the Repository Link
Navigate to Bitbucket official web-site and log in the system.
Click on the desired repository in the Repositories list.
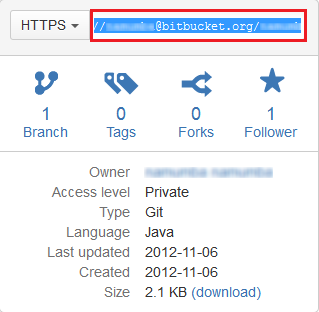
Here you should get the link to your project – just copy it from the following window:
You’ve got the https:// link of the following kind:
https://{USER_NAME}@bitbucket.org/{USER_NAME}/{PROJECT_NAME}.git
Delete {USER_NAME}@ part of the link to get such URL:
https://bitbucket.org/{USER_NAME}/{PROJECT_NAME}.git
Now all is ready for adding your project to the Cantech Cloud.
Add the Project
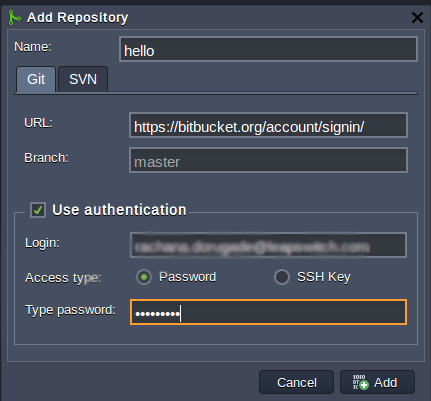
Click the Add project button next to the Maven node in your environment.
In the Add project dialog box choose the Git tab and fill in all required fields: Name of your project, Path (modified link) to your project, Branch, Login and Password of your repository, the name of your Environment and specify Context in which you will deploy your project. Click Apply.
Now, just click on Build and deploy button and enjoy. That’s all you have to do!
Update the Project
In case you’ve performed some changes in your code and want them to be applied to the project in Cantech Cloud, click Build and Deploy button next to the project in your environment.

That’s all! Open your application and enjoy developing your project.


