
Windows Servers use the PKCS#12 or PFX file as a way to backup and export SSL Certificates. This format is a binary format where the server certificate, any intermediate certificates, and the private key are stored in a single encrypted file. PFX files are usually found with the extensions .pfx and .p12.
Exporting/Backing Up a .pfx File
1. Enter Run
From the Start screen, type Run and click enter.
2. Type mmc
In the Run window type mmc and then, click enter.
3. Allow MMC to make changes
In the User Account Control window, click Yes to allow the MMC to make changes.
4. Select Add/Remove Snap-in
In the Console window, click File > Add/Remove Snap-in.
5. Add Certificates to Selected Snap-ins
In the Add or Remove Snap-ins window, under Available snap-ins, click Certificates and then Add.
6. Select Computer account
In the Certificates snap-in window, click Computer account then click Next.
7. Select Local Computer
In the Select Computer window, click Local computer: (computer this console is running on), then click Finish.
8. Click OK
In the Add or Remove Snap-ins window, click OK.
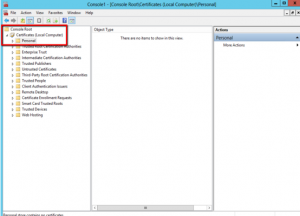
9. Expand the Certificates folder
In the Console window, in the Console Root section, expand Certificates (Local Computer), also expand the folder that contains the certificate that you want to export/back up, and then, click the associated Certificates folder. Be sure to check both the Personal or the Web Hosting folders.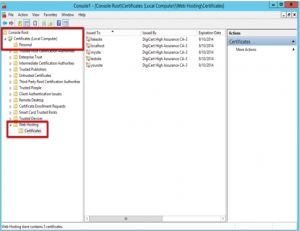
10. Right-click the certificate you want to export/backup
In the center section of the window, right-click on the certificate that you want to export/backup, then click All Tasks > Export to open the Certificate Export Wizard.
11. Click Next
Click Next on the Welcome to the Certificate Export Wizard page..
12. Select Yes, export the private key
On the Export Private Key page, select Yes, export the private key, and then, click next.
13. Select Personal Information Exchange
On the Export File Format page, select Personal Information Exchange, also click Include all certificates in the certification path if possible, then, click next.
14. Check Password
On the Security page, check Password, enter and confirm your password.
15. Browse to the file that you want to export/backup
On the File to Export page, browse and select the file that you would like to export/backup.
Note: Make sure to note the filename and the location where you saved the .pfx file.
16. Verify your settings
On the Completing the Certificate Export Wizard page, verify that the settings are correct and then, click Finish.
You should receive “The export was successful” message. The .pfx file is now saved to the location that you selected.
Importing your SSL Certificate (.pfx) File to a new Server.
1. Launch the Run window
From the Start screen, type Run and click enter.
2. Enter mmc
In the Run window, type mmc and then click enter.
3. Allow MMC to make changes
In the User Account Control window, click Yes to allow the MMC to make changes.
4. Click Add/Remove Snap-in
In the Console window, click File > Add/Remove Snap-in.
5. Add Certificates to the Selected Snap-ins
In the Add or Remove Snap-ins window, under Available snap-ins, click Certificates, then click Add.
6. Select Computer account
In the Certificates snap-in window, select Computer account, click Next.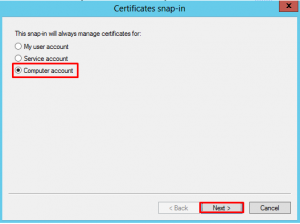
7. Select Local computer
In the Select Computer window, select Local Computer, click Next.
8. Click OK
In the Add or Remove Snap-ins window, click OK.
9. Expand the Certificates folder
In the Console window, in the Console Root section, expand Certificates.
10. Open the Certificate Import Wizard
Right-click on the Personal folder then click All Tasks > Import to open the Certificate Import Wizard.
11. Click Next
On the Welcome to the Certificate Import Wizard page, click Next.
12. Select Automatically select the Certificate store based on the type of Certificate
Follow the instructions in the certificate import wizard to import your primary certificate from the .pfx file. On the Certificate Store page, select the option “Automatically select the Certificate store based on the type of Certificate”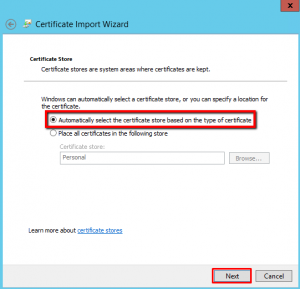
13. Verify your settings
On the Completing the Certificate Import Wizard page, verify your settings and then, click Finish.
You should receive a “The import was successful” message.
14. Enable your certificate
After you import the SSL Certificate .pfx file, you need to enable the new certificate on the server.